Tiller connector repair
Modern Hobie 16s have the Miracle 20 tiller connector, which is a huge improvement over the older bolted connection. Still, my connectors were a bit loose so I decided to overhaul them.
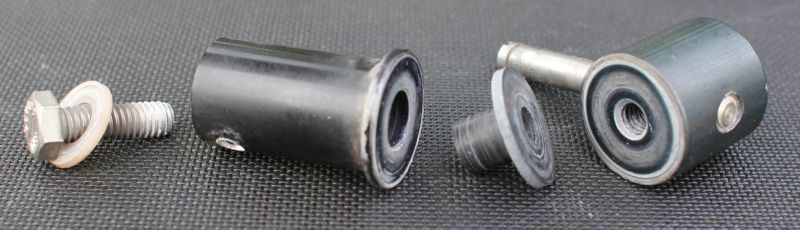
From the left: Bolt, plastic washer, base (that fits into tiller arm), bearing, and end cap (that connects to the crossbar).
I was expecting to see a shouldered bolt holding it together with wear on the bearing, but there is no shoulder; the assembly is tightened to the right degree and then red Loctite is used to hold it there. The slop was due to two things:
1) bolts may not have been tightened enough
2) the head of the bolt digs into the washer, which creates slack in the assembly as shown here:
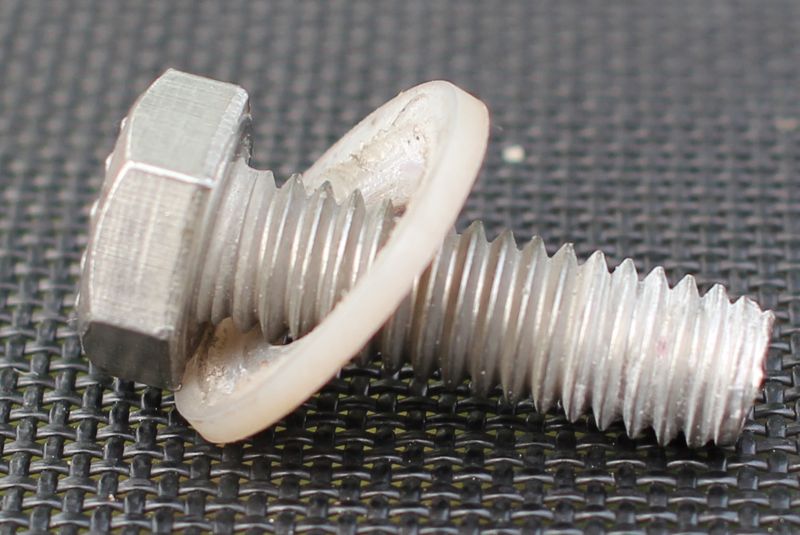
So my rebuild consisted of replacing the plastic washers and using thin stainless steel washers directly under the bolt head to protect the plastic washer. Then reassemble with red Loctite and tighten until the slop is just gone. Some drag is OK; this does not need to be a zero-friction bearing.
For each side you will need two tiller arm rivets 8010131 and one washer 8080691. The stainless steel washers were not Hobie parts; I don't even know where they orginally came from. Find thin stainless washers that at least cover the bolt flanges and hopefully cover most of the plastic washer.
- Drill out the tiller end rivets
- Unscrew the bolt
- Clean the parts
- Reassemble with new plastic washers and stainless washers, using red Loctite on the threads
- Tighten until you begin to get some drag as you spin the parts against each other. All of the slop should be gone by then.
- Once the Loctite has set, re-rivet the assembly to the tiller arm.
Tiller connectors

