Self-tacking jib
By Filip Kuijken
During last winter~early spring's usual maintenance and small repair works to prepare the boat for the season, I started dreaming about how handy a self tacking jib would come in... I sail my 16 solo most of the time on a superb lake (Inawashiro) here in Japan. I never do any racing, so do not worry about this being class legal or not. Mainly made it for the fun of making it, and keeping me busy during the off season (5 months no sailing... sure you know the feeling). During the last weeks/months I have tested it under different conditions, and I'm quite enthusiastic about it, not just the self tacking, but evenly so the self jibing. I have kept all the original blocks and rails for the jib sheet routing (just in case it wouldn't function well), but so far don't wish to go back there.
So here's how I made it, easy to do, did not take much time nor costs. Found an old parts boat where I could drill out the main traveller track from the rear cross beam. Kept the traveller car also. I then bought an "L" shaped aluminum profile (3meter long) at the local home centre. Couldn't find rivets with a flat head (all my rivets have a round head which would block the traveller car), so I used flat head stainless screws and nylock bolts to attach the traveller track to the aluminum bar. I kept the alu profile a few cm. longer than the traveller track on both sides, to put an "eye" bolt there. This serves both as a stopper for the traveller car and as a fairlead for the jib sheet.
Next I cut this combo the desired lenght to attach it to the front crossbeam (corner casting to corner casting). Fixed it with 6mm stainless bolts and stainless rivets. From the same parts boat, I also recycled 2 swivel cam cleats. I riveted one on each side rail of the tramp frame, just behind the corner casting. These serve for controlling the jib sheet.
To route the jib sheet, I just needed a shackle large enough to attach 2 single blocks to the traveller car, the jib clew plate now only needs 1 single block. The jib sheet is routed in a loop, going from one swivel cam, through the "eye bolt fairlead", the first block on the traveller car, the jib clew block, the 2nd block on the traveller car, through the "eye bolt" on the opposed side, and finally the other swivel cam cleat. I then tie both ends of the sheet together, thus creating a closed loop (and serving as a stopper knot for the swivel cam cleat). This looped routing has the advantage of making it possible to control/adjust the jib sheet from both sides of the boat now.
For controlling the position of the traveller car, I tie a seperate line to another "eye", bolted to the front side (exactly in the middle) of the aluminum bar/traveller track. Then pass this line through the traveller car (the same way we do for the main sheet/traveller), pull it through another eye I riveted on the cross beam, just under the mast step (this is not absolutely necesarry, it is also possible to pass the line behind the dolphin striker rod) and finally put it through the swivel cam on the front beam that was there originally for the jib sheet control. Another nice thing about this system is the full length of the traveller track (compared to existing self tacking jib systems seen on other cats), making it possible to travel out the jib all the way, for those of us who don't like pitching.
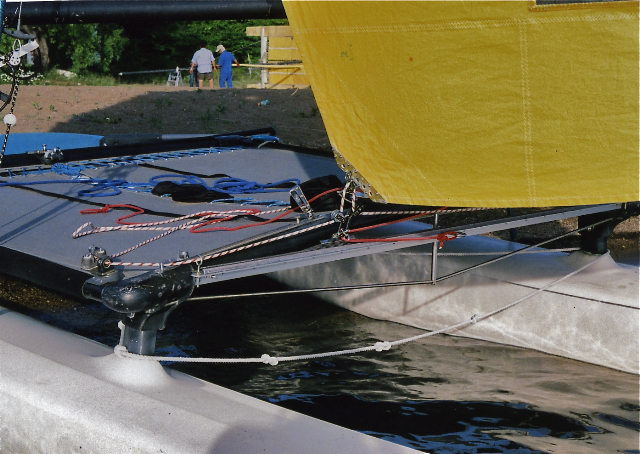
Front view of the set up, the red line is the traveller control line, the white/red line the jib sheet
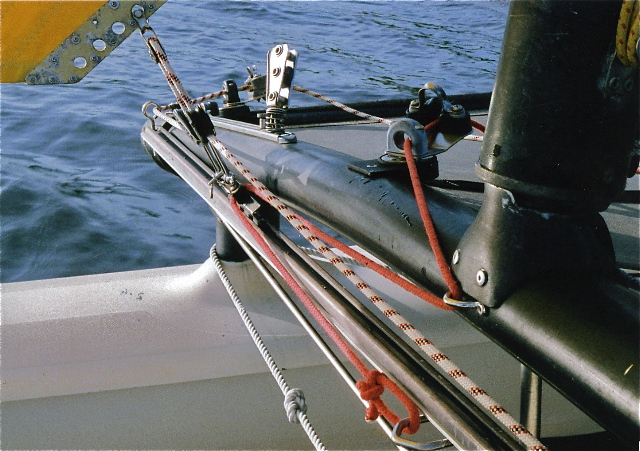
Here's a detail of the jib sheet routing. The passage through the block between the swivel cam and the stopper/fairlead on the track is not really necesarry, but since the block was there already, the line runs smoother passing through.
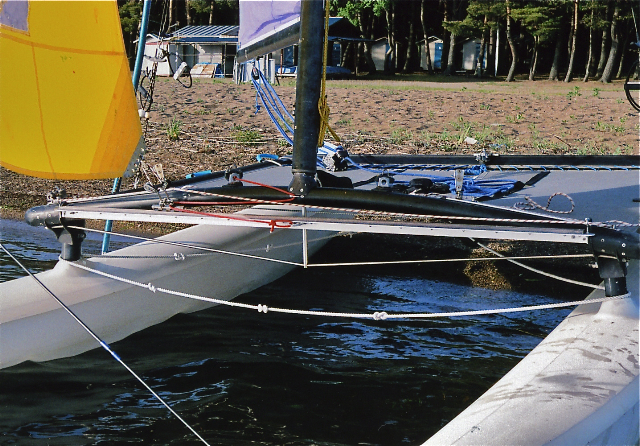
A closer look at both lines routing, you can see on all pics here that I tied the red traveller control line directely to the "eye" in the middle of the bar. During tacks and jibes sometimes it happened that the bowline knot stayed on the old side, making the car travelling a few cm. less. Lately I just passed the line through the eye, and the tied it to the dolphin striker rod. One could imagine an even more simple design, just drilling a hole through the aluminum bar, pulling the rope throug and finish with a stopper knot.
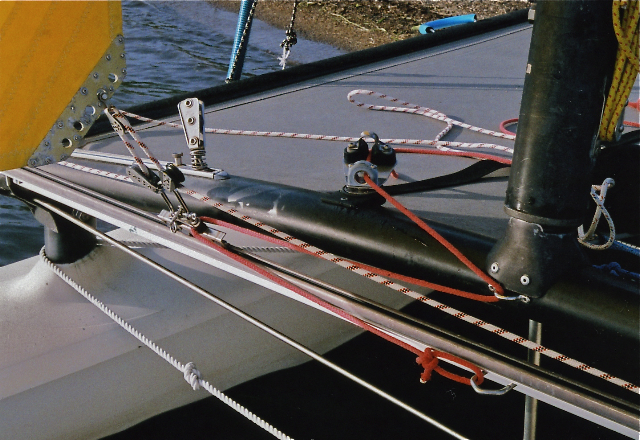
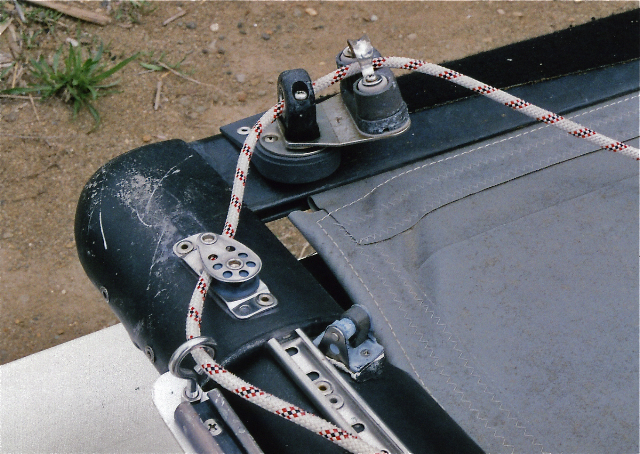
Here you see the 3 blocks necesarry. I would like a lower shakle to attach the 2 blocks on the traveller car, unfortunally, the ones I found large enough are all high (not that it's a big deal, but hope to change it later).

This one can show you the jib sheet is now controllable from both sides of the boat.
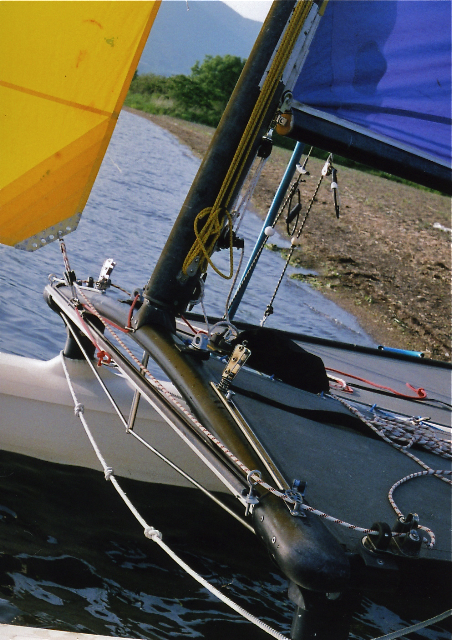
And some more, just for fun.